


Every day at ParentShield we explain how ParentShield’s Mobile phone controls protect vulnerable users on their Mobile Phones. The topic of how to protect them at home while their mobile devices are connected to the WiFi often comes up!
So we have put together a simple guide to producing a reliable and effective home network that provides the younger users with a safe customisable internet experience and allows the grown-ups full internet access without endless arguments over access to the password!
We’re often asked how it’s possible to set up the internet at home so:
- Children can have individual time controls by device
- Parents get normal internet access unaffected by controls
- You can block websites individually or whole categories of websites in one go
- No changes need to be made to your existing router
There are many ways to achieve this, so we’ve described here what we have done for our own families and avoids too much configuration and provides a rock-solid and improved internet experience for everyone. We’ve opted to buy a value for money second WiFi router for our solution. This avoids having to touch or alter your existing router in any way. ( Apart from changing the WiFi password of course.)
What we used:
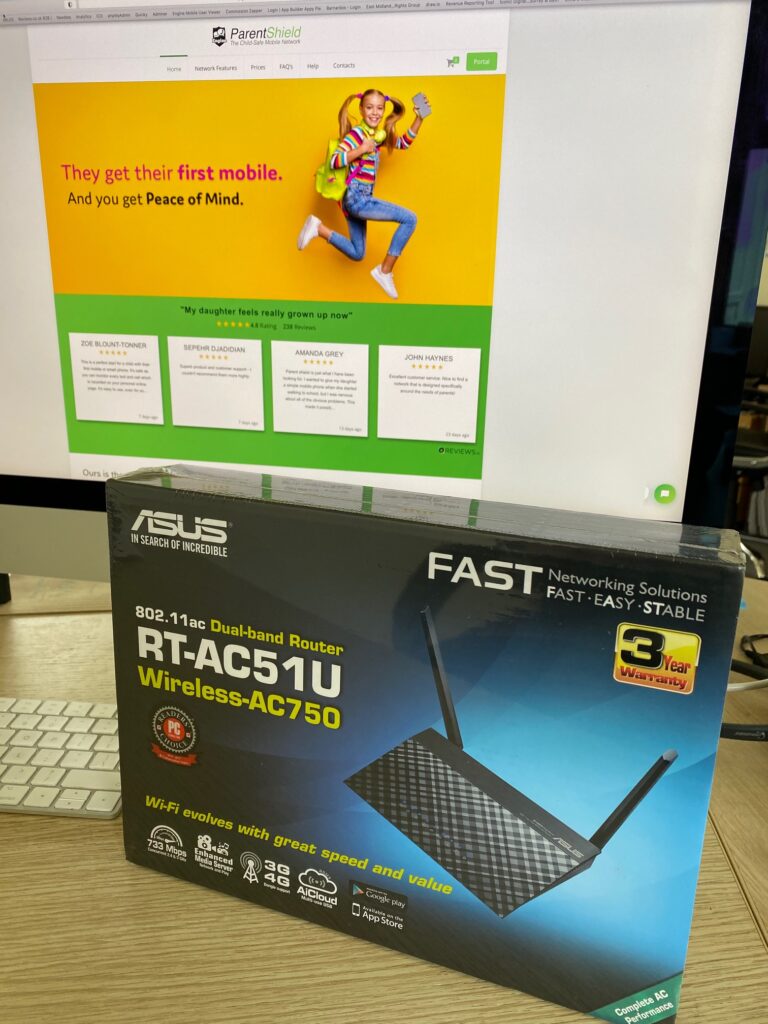
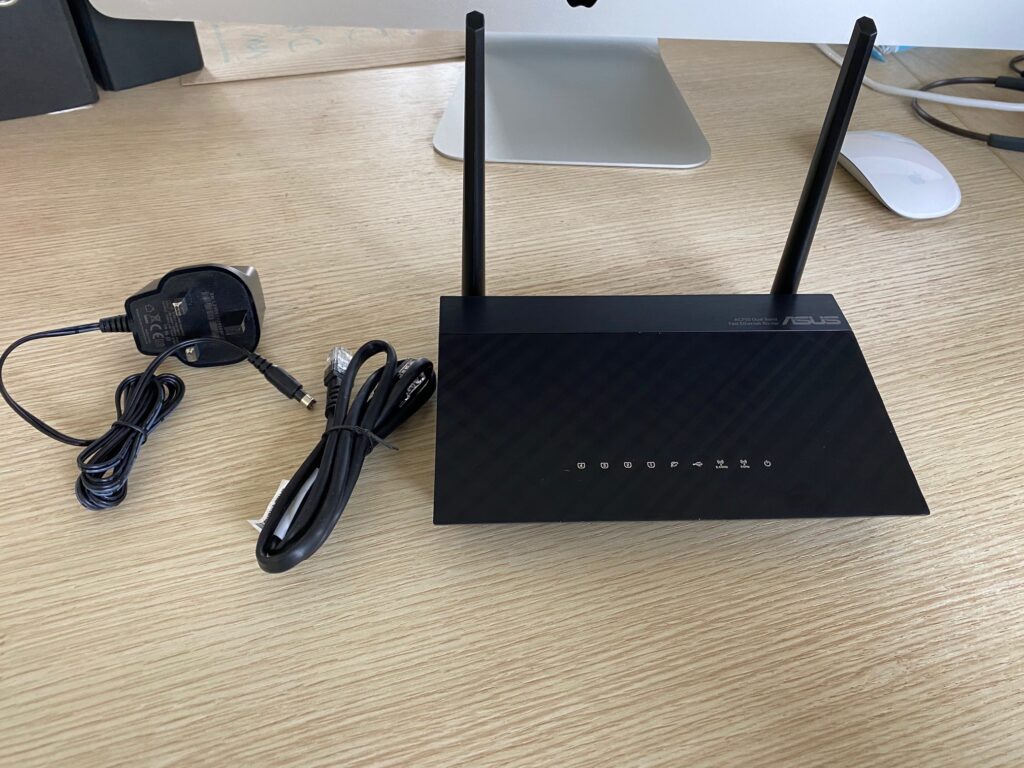
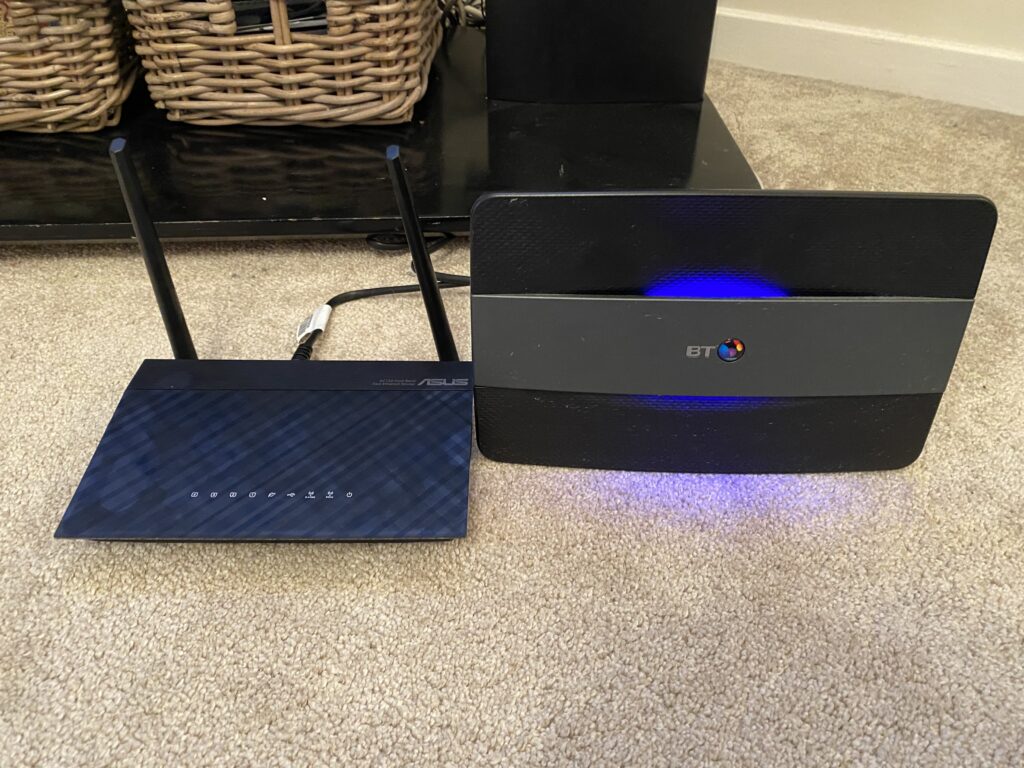
We picked up a basic Asus WiFi router from the local computer shop. This one was £35. Most WiFi routers would be OK but the configuration will of course be slightly different. Asus hardware has always been reliable for us so that was our pic.
Wiring Up
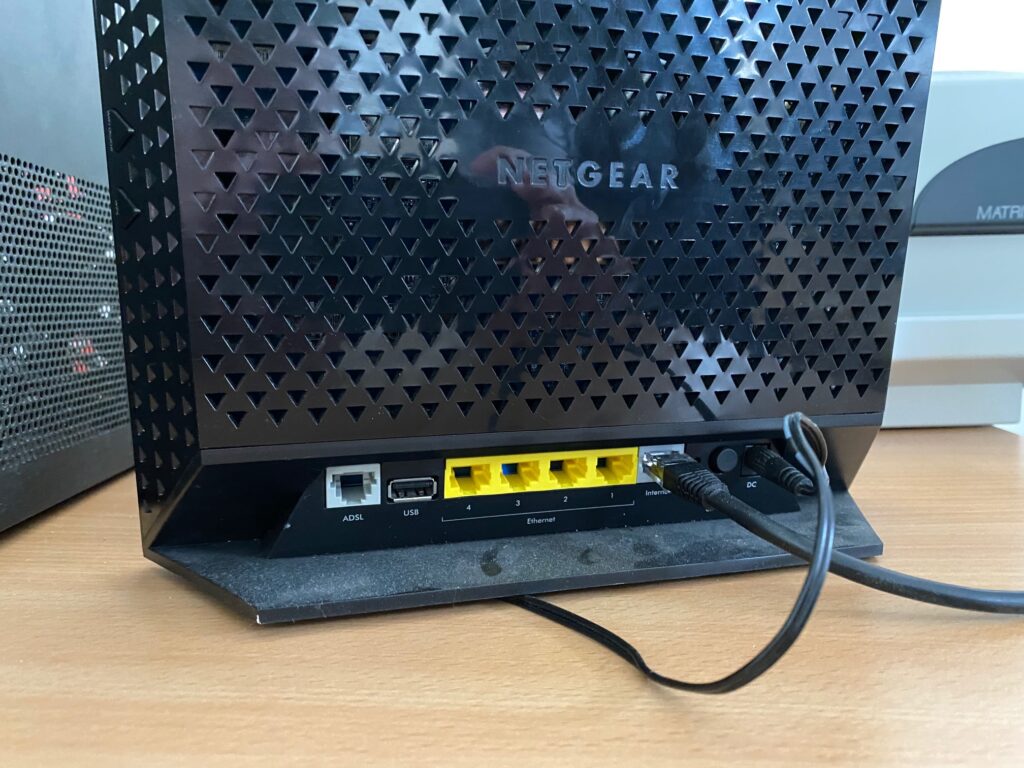
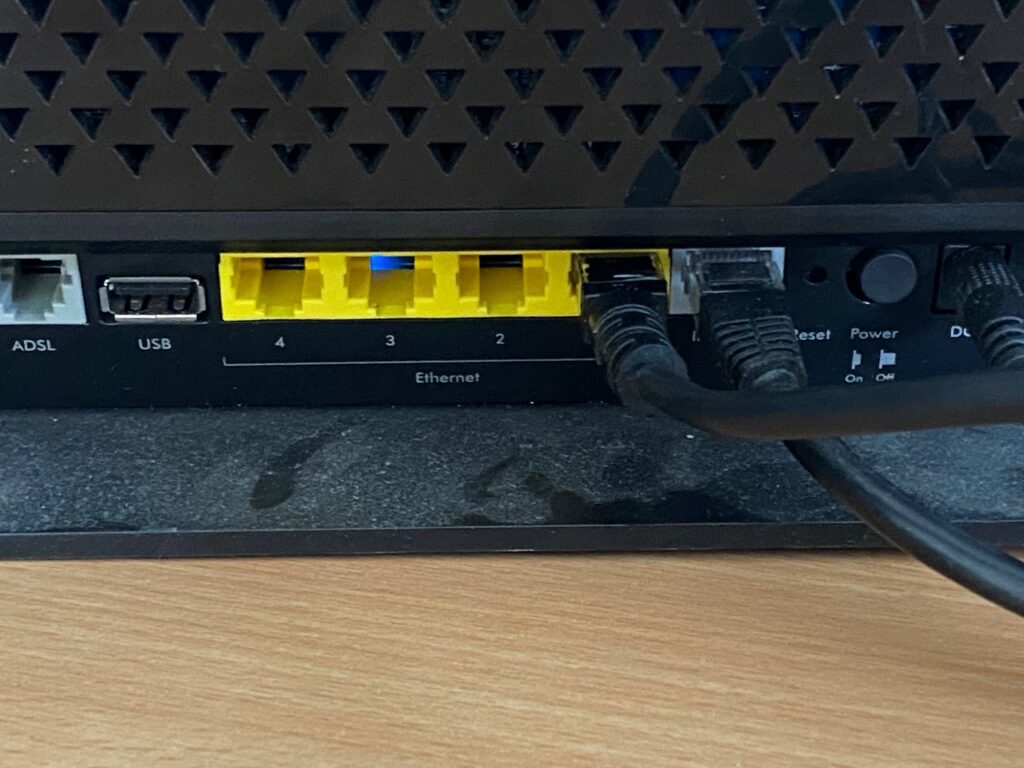
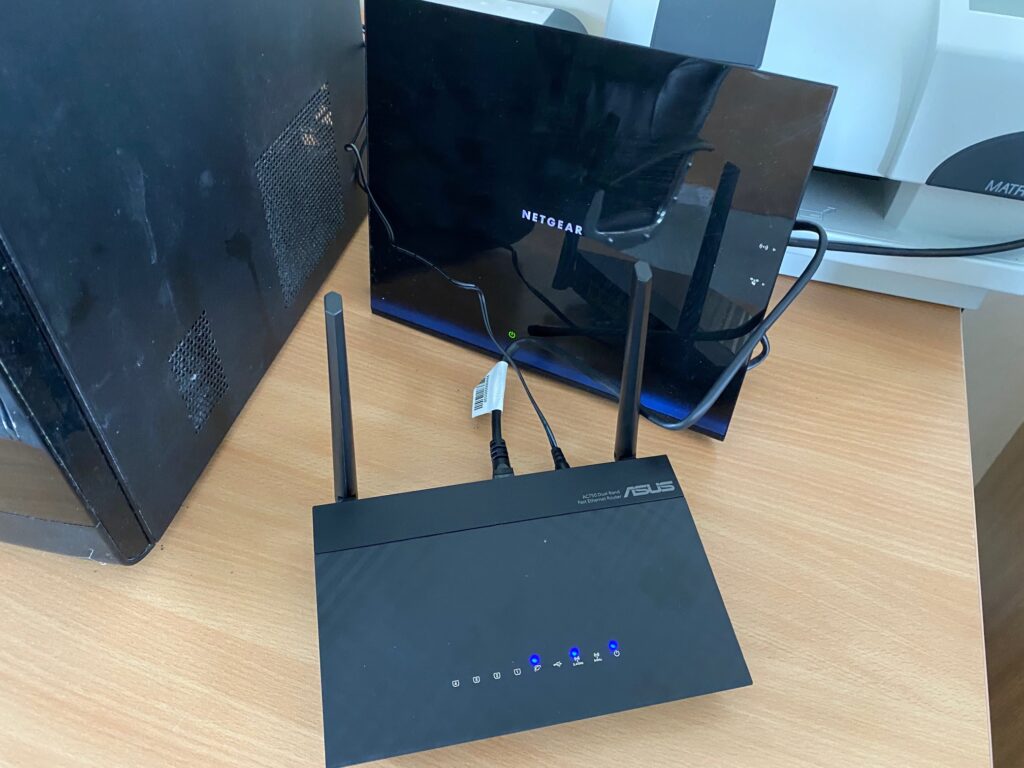
There will be a CAT5 cable in the box. Simply connect the Asus children’s router to your Home router by connecting the CAT5 cable from the blue ‘WAN” socket on the back of the Asus router ( the socket with the little ‘world’ logo above ) to one of the the Home router’s LAN sockets. Chances are, plugging it into any spare socket that fits will be fine.
That’s it. Now tidy up the cables and wires before anyone gets in trouble or trips over them and pulls the whole thing off the shelf.
Sign up with OpenDNS
In addition to the time and access controls that the router provides we want to provide access to a good database of websites, already categorised as to their suitability for younger users.
The chances are your broadband provider will offer a similar thing but using that ( if they provide it ), has a few pitfalls. It will mean that the whole family is subjected to the same controls, and the databases they use are generally, from our experience, very poor. OpenDNS is part of Cisco and has a massive worldwide customer base that every user can contribute to.
And it’s faster.
Your internet provider’s DNS service is likely poor, slow, and very basic compared to that available from OpenDNS, Google or Dyn. You may have already switched your DNS and discovered the improvement you can make, but it is often quite an improvement. After setting the kids up with better and faster internet, it’s well worth thinking about doing the same on your main router.
Go here: https://www.opendns.com/home-internet-security/
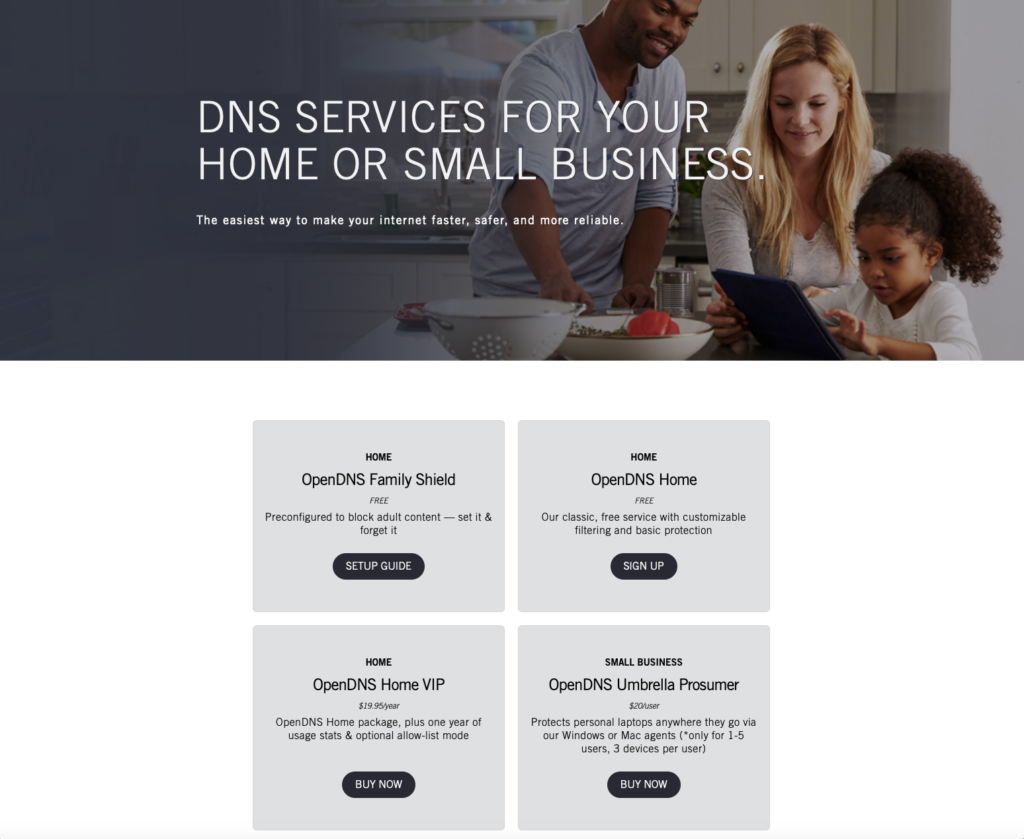
You’ll see four products available. We set ours up with OpenDNS Home. This provides quite customisable internet access so that’s the one we detail here. For a simpler configuration that simply blocks adult content, then OpenDNS Family Shield will be suitable and, as a bonus, you can skip this step and fast forward to “Configuring the Children’s Router” below. If that’s for you I’ll carry on writing, and see you down there shortly.
1. Signing Up with OpenDNS
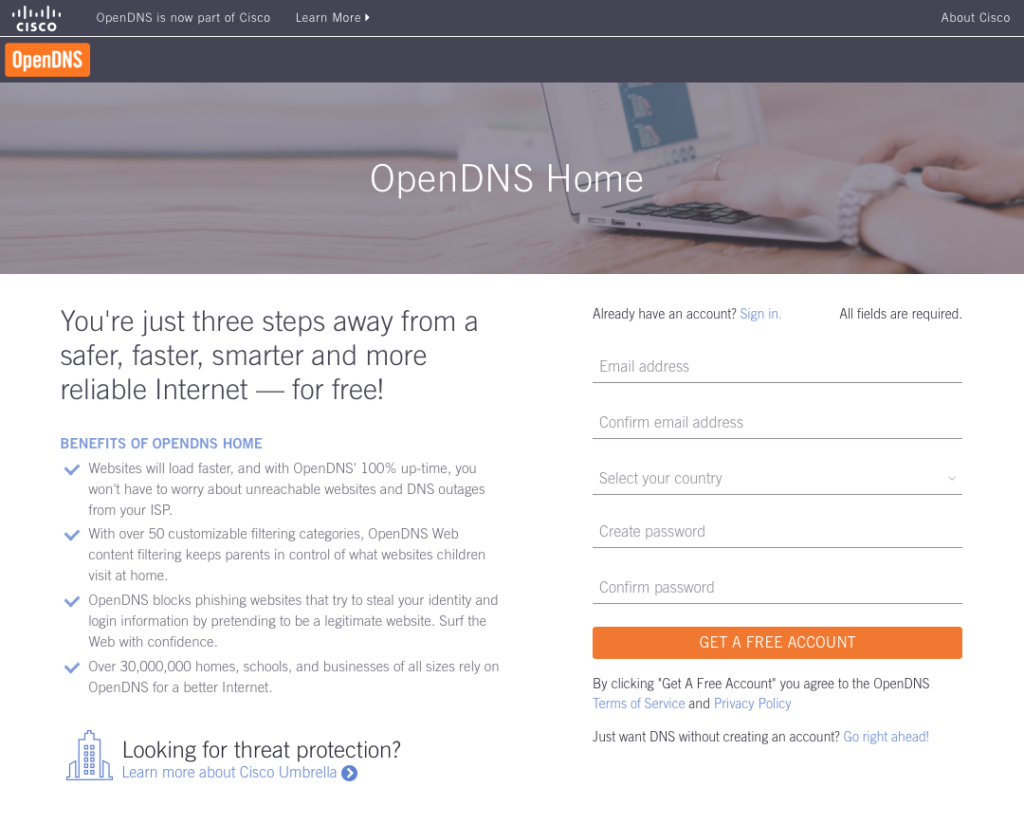
After you sign up ( this is a free service ) OpenDNS will send an email to the address provided that you will need to acknowledge in order to activate things.
2. Add a Network
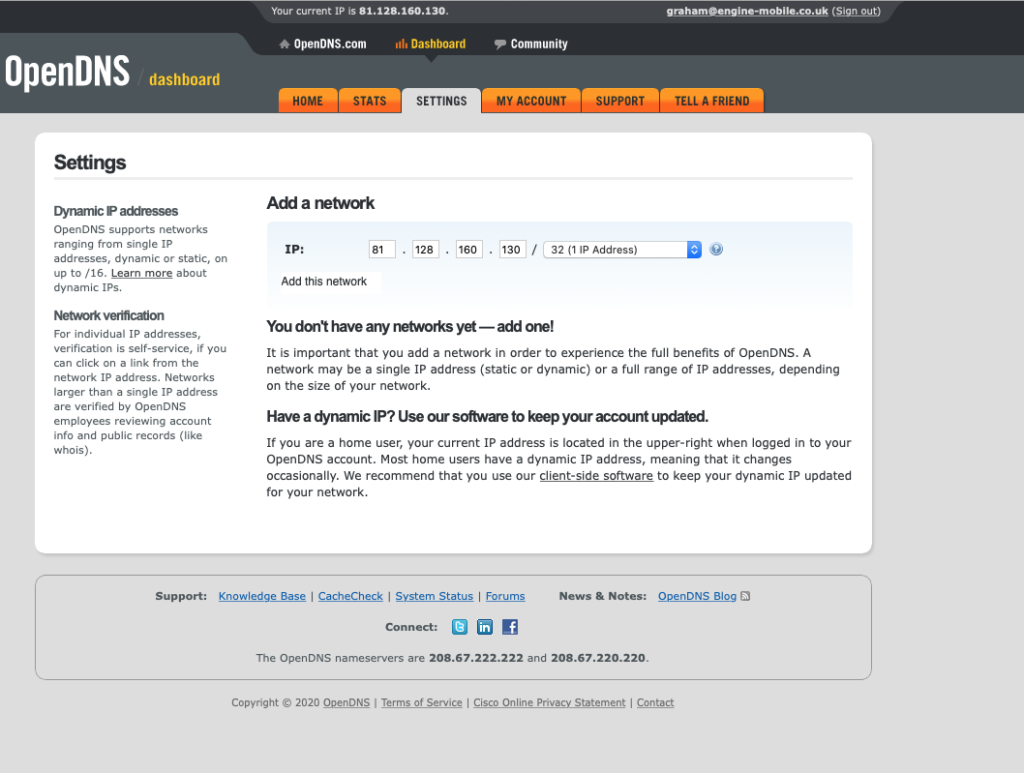
To allow OpenDNS to show you all the websites that your children have visited, or tried to visit, but were blocked, you will almost certainly need to tick the little box say you have a Dynamic IP address. To update OpenDNS as automatically as possible every time your IP address changes, you will need to download and install their Updater Application on your Laptop/PC/Mac etc.
Here is a link to OpenDNS Support Document about updating Dynamic IP addresses.
https://support.opendns.com/hc/en-us/articles/227987787
There is a link there to download the Updater App for Windows or a Mac but if you are one of the many people who have done away with the PC tower in the corner of the living room and only use a tablet or mobile phone there are a couple of alternatives. The only thing to remember is only to use them when you’re connected to your home WiFi and not Mobile Data. It’s not terminal, but can potentially result in you seeing some websites visited in your stats that weren’t visited by any of your children.
For Android – there is quite a nice App in the Play Store – “OpenDNS Updater” which works quite nicely.
For iOS devices there isn’t an App but it’s very easy to create a desktop shortcut to this link:
https://updates.opendns.com/nic/update?hostname=[Insert your network label here]
If you visit that link, and log in with your email address and password for OpenDNS, their system will learn where you are and keep things updated.
3. Select Your Protection Level
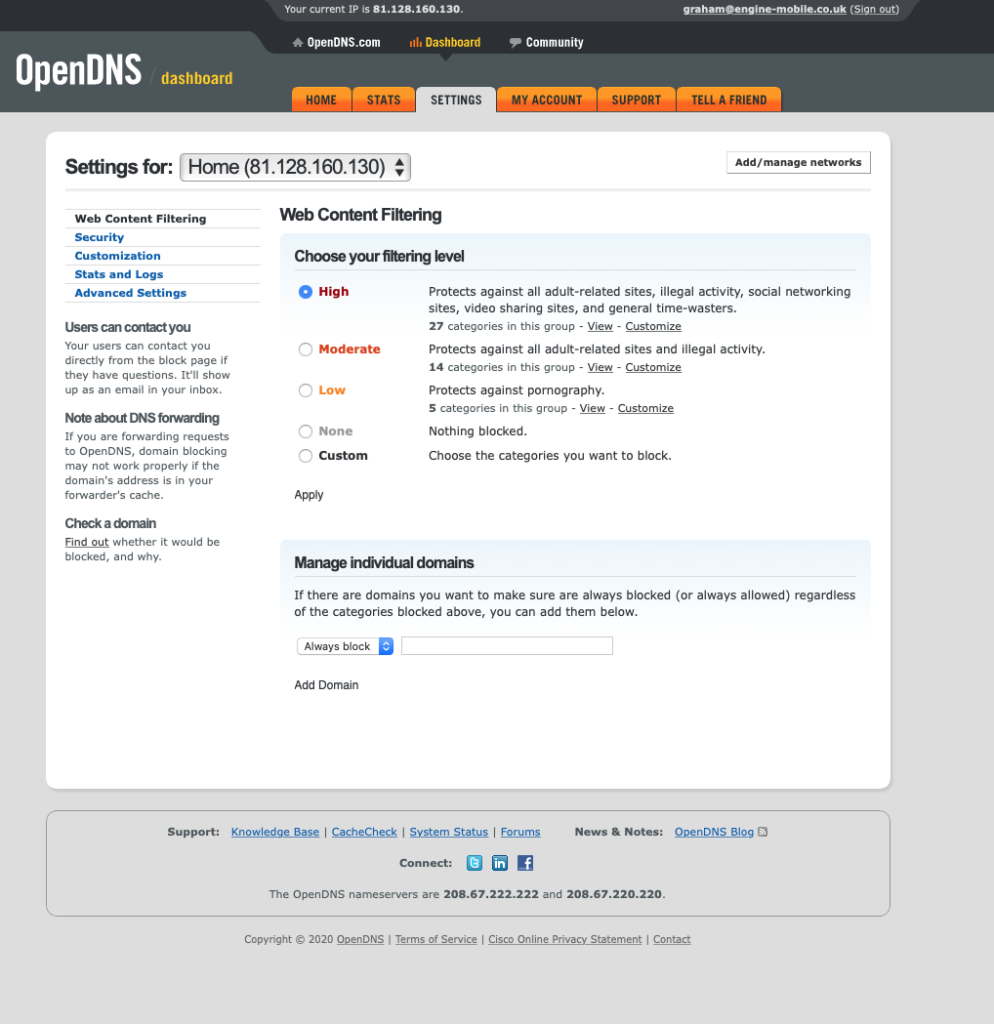
Here we’ve selected the most aggressive filtering level, but you’ll need to have a look at all the options and set this up for your particular needs and concerns. You’ll see you have the ability to block individual websites which is really handy and goes one step further than most ISP’s off-the-shelf blocking services.
Configuring the Children’s Router
After you have plugged the new Children’s Router into the Home Router and turned it on, you will see a new unsecured WifI access point appear on your mobile devices. In our case with this Asus Router it is called ASUS and ASUS-5G. If you are configuring a different router ( or your home router for whole-house access control ) then these steps below will be a little different – but basically the operation is the same:
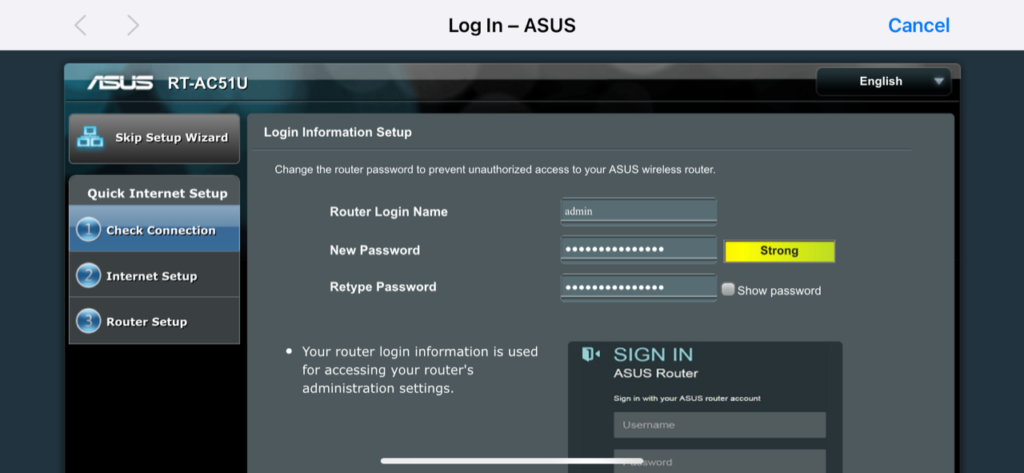
- Create a secure Admin username and password for you – not to share with the children!
- Set the SSID ( WiFi name ) and password that the children can use – and even share with their friends that come over.
- Set the WAN ( Wide Area Network – that’s the Internet side of the network ) DNS servers to those of OpenDNS – 208.67.222.222 and 208.67.220.220
- Optionally set per-device time controls on the Children’s Router
1. Setting a secure Admin Username and Password
2. Set the Children’s WiFi Network Name and Password
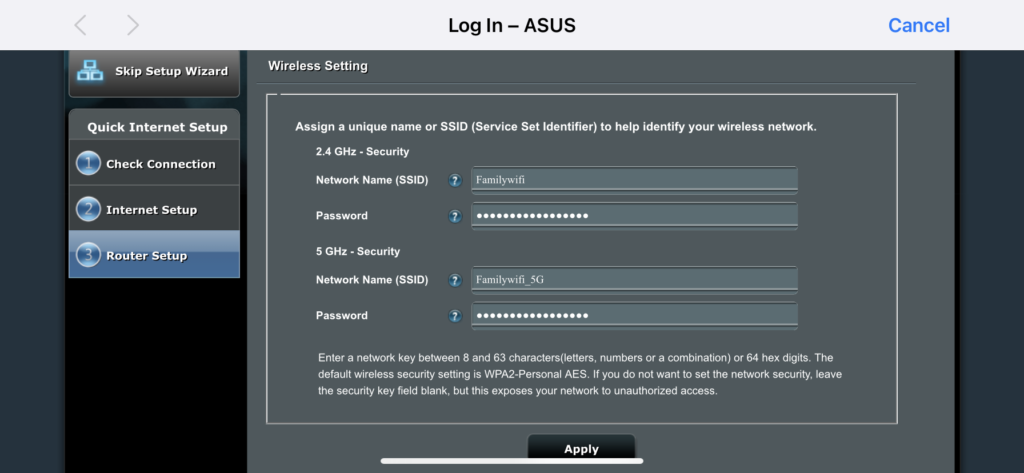
The Password also belongs to them! Use this as an opportunity to teach the importance and technicality of how to chose a secure, yet memorable password. You will also need them to be logged in before you get to step 4.
If you are struggling with this – Humans are rubbish at making up passwords – we would recommend asking them to provide three random words that they can’t link in any way at all, and put those together as a password.
3. Set the WAN DNS in the Children’s Router
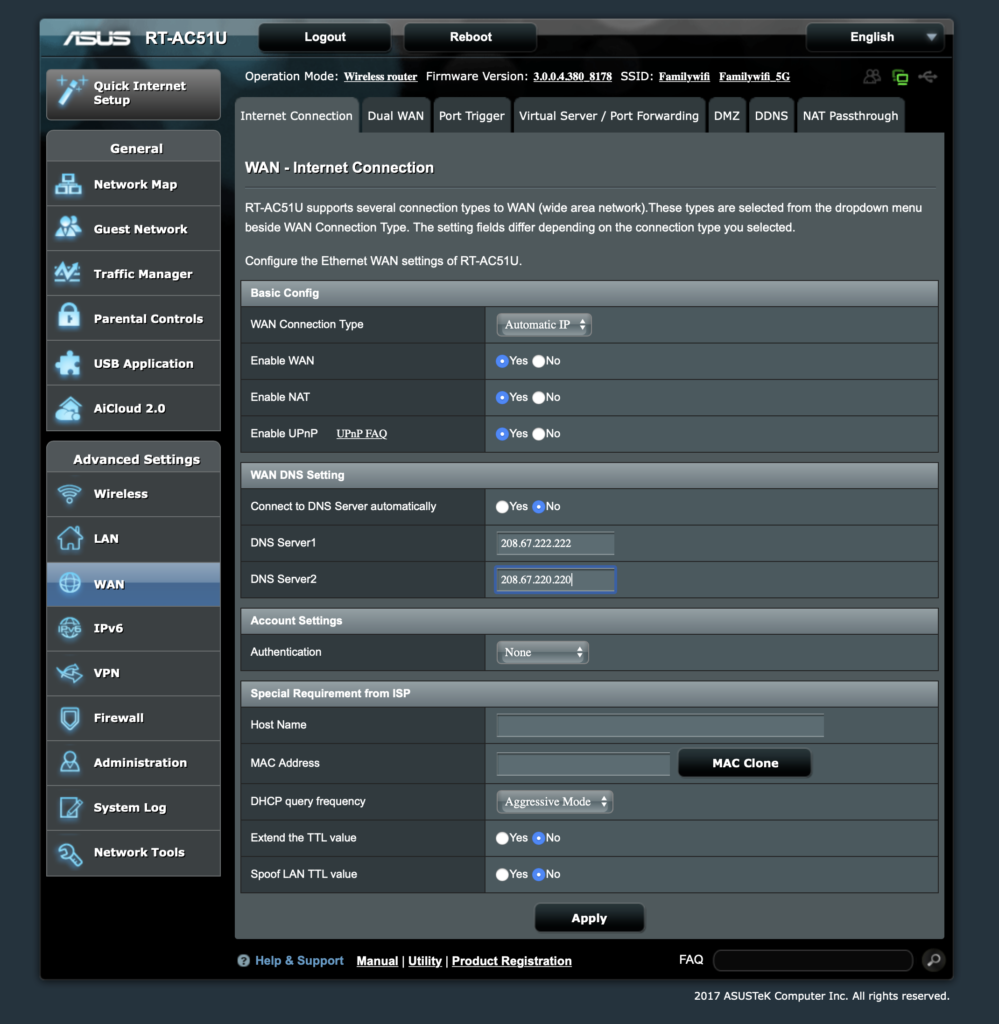
Set the two DNS Servers to the following values, as seen in the screenshot above. And then apply and save the settings.
- DNS Server 1 : 208.67.222.222
- DNS Server 2 : 208.67.220.220
4. Set Parental Controls on the Router
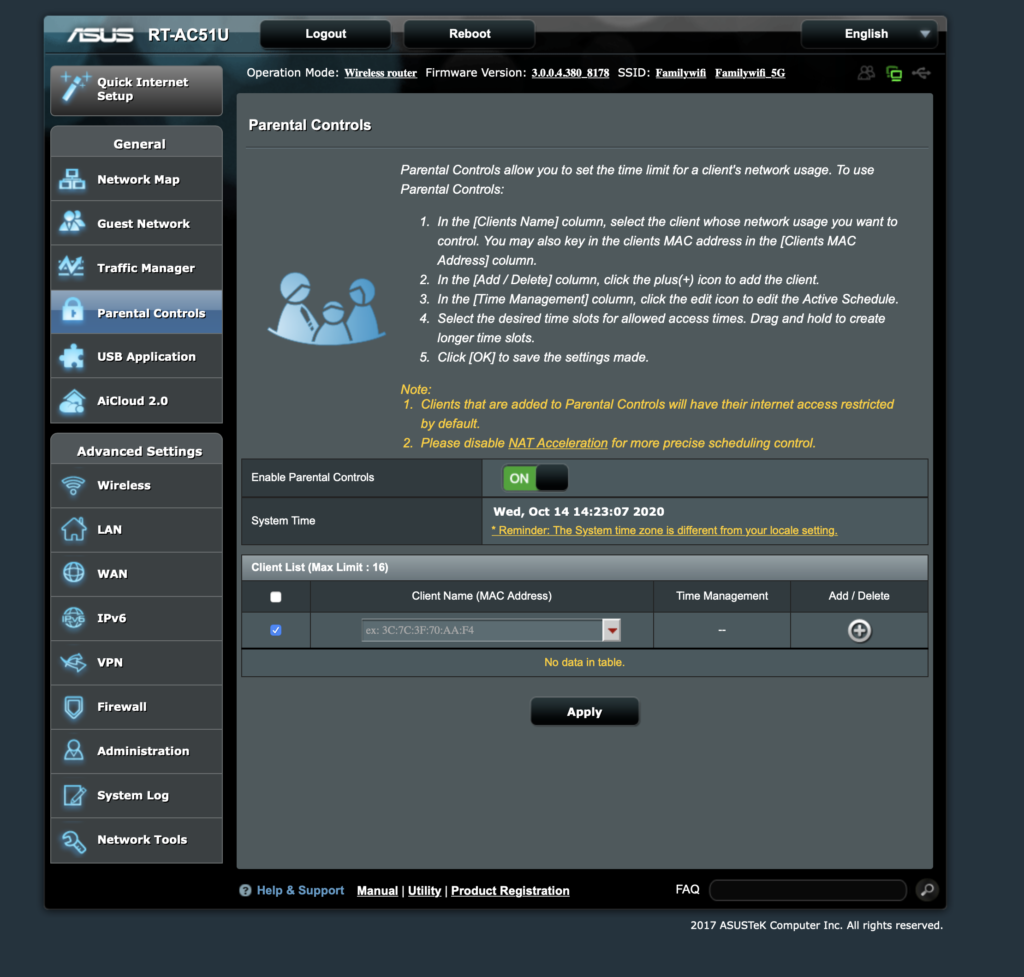
If you want to set Individual time controls you will have to leave this step until the Children have connected at least once with their many devices!
Choosing Parental Controls from the “General” pane on the left you can access the Parental control settings. Find individual devices in the “Client Name” drop down and add that device.
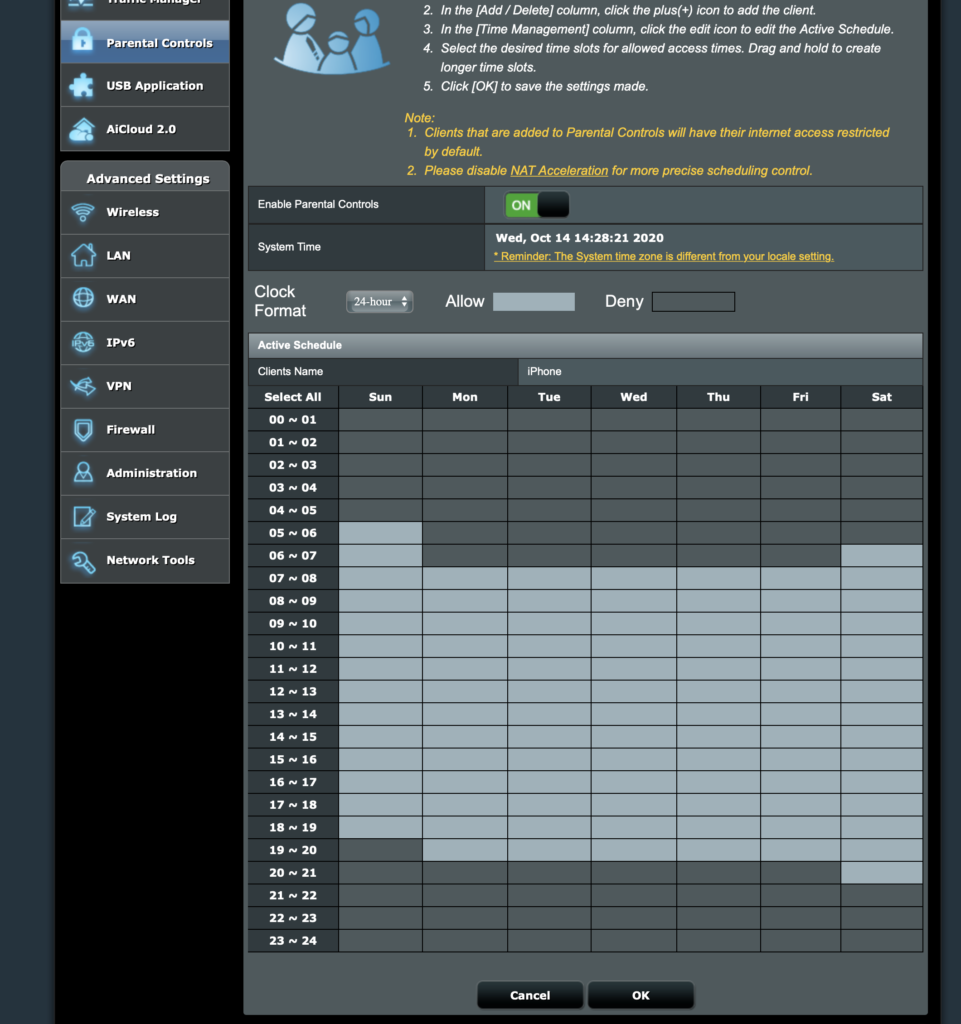
Time controls can be set for each individual child or device. We’ll leave you to negotiate.